
Opinions
Tips & Tricks for Mac You Ought To Know
Thursday, October 13, 2011
Calendar App in iOS 5 - Followup Round 2 (Video)
Calendar App in iOS 5 - Followup Round 1

"What's that?" you said. Yup, remember the Week view we saw in earlier post? Turns out, even when your device is in portrait mode, you can go to the adjacent dates just by swiping left or right. That's right, just like how you navigate pages of apps on the home screen. Should've thought of that long ago, Apple. Just saying.
By the way, when you move an event by touch (see previous post), you can move to adjacent dates by dragging the event to the left or right edge of the screen. Again, similar to how you move an app icon across pages on the home screen.
Have fun!
Calendar App in iOS 5
The Calendar app in iOS5 is shipped with some new and useful tricks that is going to make your schedule making a little more touchy-feely.
The Long-Press Gesture
Up until iOS4, the only way to add a Calendar event is to tap the "+" button on the top right corner in the app.
New in iOS5, when in Day view, you can long-press anywhere with open slots, and a new event will appear on the screen right beneath your finger. Nifty. The new event will be hovering on the screen, following your finger wherever it goes until you let go of the touch, allowing you to place it on the time slot you desire.

Creating a new event by long-pressing the screen.
If you long-press an existing event, that event will also appear to be hovering, making it easy to move an event by touch.

Moving an existing event by touching.
Changing Event Duration
After lifting your finger from the long-press gesture, you will see two little circles attached to the event, one on top, and another below. These circles are the handles for you to change the duration of an event: dragging the top circle changes the start time, and the bottom circle the end time.
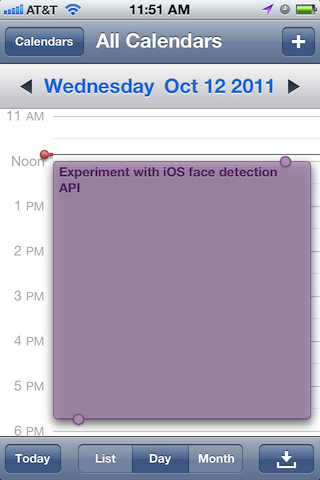
Changing duration by touching.
Week view in iPhone
Thanks to a larger-size screen, iPad's Calendar App has always have a Week view. In iOS5, iPhone gains the similar capability, finally.
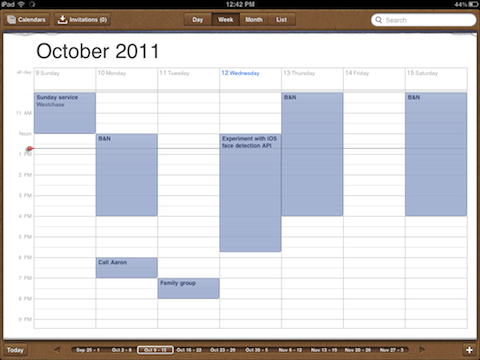
Week View on iPad.

Week View on iPhone.
Update
More tricks have been discovered:
Wednesday, October 12, 2011
Upgrade to iOS 5 - with Cautions
By now you should have learned that iOS 5 is officially released. Without further ado, let's go over the steps to upgrade your iPhone / iPad / iPod Touch to the latest operating system:
- Make sure you remember your Apple account
The account you use to purchase items from iTunes and the App Store will be your iCloud account. You will need that for iOS 5. Have it ready and it will come in handy later. - Back up your device
Connect your device to iTunes via USB and allow iTunes to make backups automatically.
- Install iTunes 10.5
If you haven't already, download and install iTunes 10.5. - *Important* Make some space on your device
You should have copies of your music, movies and apps in your computer already. Make sure that's the case, and proceed to remove some content and make space available on your device, for reasons I'll explain later. - Upgrade to iOS 5
Click the "Check for Update" button in iTunes, which can be found on the device page when the device is connected. Follow the prompts, and let iTunes handle the rest.
- Set up iOS 5
Once your device comes back to life, you will see some unfamiliar screens. No worries, they are simple steps for iOS 5 to set you up with iCloud services. All you need is your Apple account ID and password, and deciding on what services on iCloud you'd be using. These services are FREE! - Refill your device
If you followed my advice on the 4th step, now is the time for you to refill your device with content.

