New year is just around the corner, soon we will se more enhancements on iPods, the rollout of Intel based Macs, and the launch of the next generation Mac OSX 'Leopard' from Apple. 2006 isn't going to get boring in the world of Apple. Hold your breathe!

Opinions
Tips & Tricks for Mac You Ought To Know
Saturday, December 24, 2005
Merry Christmas and Happy New Year to all Mac Users!
Thank you for the wonderful year of 2005. The exchange of Mac tips and ideas on this blog has been most fun for me, and I just hope that you have enjoyed it just as much!
New year is just around the corner, soon we will se more enhancements on iPods, the rollout of Intel based Macs, and the launch of the next generation Mac OSX 'Leopard' from Apple. 2006 isn't going to get boring in the world of Apple. Hold your breathe!
New year is just around the corner, soon we will se more enhancements on iPods, the rollout of Intel based Macs, and the launch of the next generation Mac OSX 'Leopard' from Apple. 2006 isn't going to get boring in the world of Apple. Hold your breathe!
Sunday, December 18, 2005
How to Add Album Artwork to iTunes
An album artwork is a little piece of picture that accompanies a piece of song in iTunes. You can think of it as the beautiful CD cover you used to get in those days when you still bought CDs.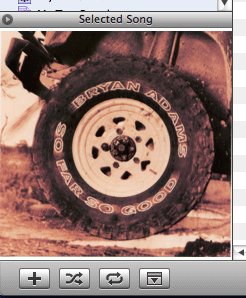
Another instant when you get album artworks automatically is when you subscribe to podcasts on iTunes' podcast directory. Usually a podcast's album artwork is just the podcast's logo.
Adding a picture to a piece of music is easy. First make sure the album artwork window is set to display the "selected songs". Then, select a song in your library. Now if you have the CD cover scanned into a file, or you are able to find the CD cover from some website, you just need to drag and drop the file or the picture to the album artwork window.
Drag and drop a picture to the album artwork window.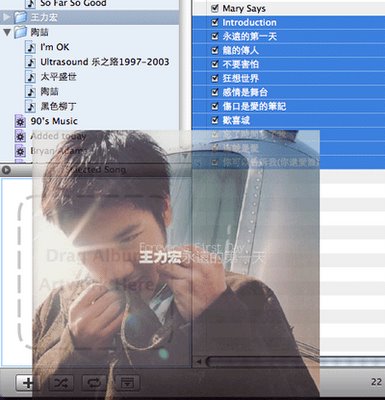
Album artwork is added successfully.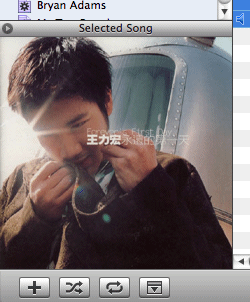
To add the same picture to a number of songs, e.g. all the songs of a single album, you can multiple-select the songs and repeat the same steps as mentioned.
When will you get Album Artwork automatically?
When you purchase the entire album from the iTunes music store, you will realize that a picture, the CD cover, is added to each of the songs as well.Another instant when you get album artworks automatically is when you subscribe to podcasts on iTunes' podcast directory. Usually a podcast's album artwork is just the podcast's logo.
How to add Album Artwork manually?
If you rip your own collection of CDs into iTunes, something all of us do, you have to find and add the album artwork yourself.Adding a picture to a piece of music is easy. First make sure the album artwork window is set to display the "selected songs". Then, select a song in your library. Now if you have the CD cover scanned into a file, or you are able to find the CD cover from some website, you just need to drag and drop the file or the picture to the album artwork window.
Drag and drop a picture to the album artwork window.
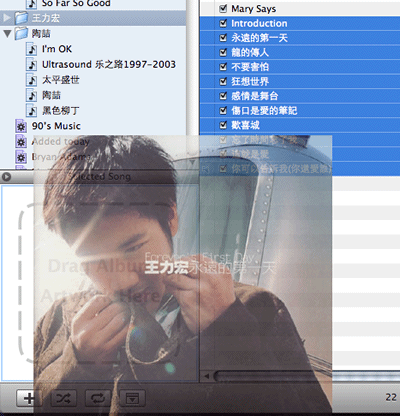
Album artwork is added successfully.
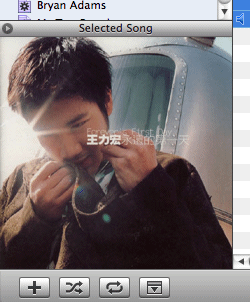
To add the same picture to a number of songs, e.g. all the songs of a single album, you can multiple-select the songs and repeat the same steps as mentioned.
Bring the Album Artwork with you on your iPods
Provided that your iPod has a color screen, or you own the ROKR, the album artworks will be transfer over as well when you sync your device with iTunes. No additional work is needed, just sync.Yet another Mac tip is on the web!
Wednesday, November 30, 2005
Filtering Spotlight Search in Finder
Since the launch of Mac OS 10.4 aka Tiger, Apple has replaced the "Search" box on Finder with Spotlight search.
 While it is much more convenient to access Spotlight at the menu bar, its straightforward style of searching often produce a bloated result that may not satisfy you. To do a filtered search, Finder would be a better place to go.

You can add multiple filters to a search result. For example, if you want to search for photos associated with "lake" that is taken within last two years using an Olympus camera, you can add the filters in the order of "Kind", "Created" and "Device make".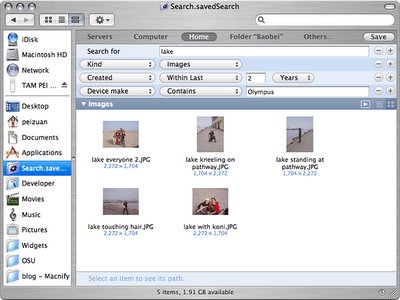
The work-around method is to always keep Smart folder at the Finder sidebar, and name it so something general, like "Search".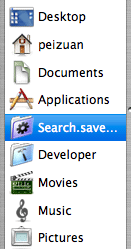
Whenever you want to set up filters before doing an actual search, you can open the general Smart Folder and the filters are already your service right away.
 While it is much more convenient to access Spotlight at the menu bar, its straightforward style of searching often produce a bloated result that may not satisfy you. To do a filtered search, Finder would be a better place to go.
Filtered Search
In Finder, type something in the Search box, and the Finder window will instantly switch to showing Spotlight search results. There is a "Save" button for you to save your search results to something called the Smart Folder, and a "+" button to add filtering options.
You can add multiple filters to a search result. For example, if you want to search for photos associated with "lake" that is taken within last two years using an Olympus camera, you can add the filters in the order of "Kind", "Created" and "Device make".

Smart use of "Smart Folder"
If I were to grudge about Spotlight in Finder, it would the arrangement whereby search filters are hidden from the user until the user starts punching stuff into the Search box.The work-around method is to always keep Smart folder at the Finder sidebar, and name it so something general, like "Search".

Whenever you want to set up filters before doing an actual search, you can open the general Smart Folder and the filters are already your service right away.
Yet another Mac tip is on the Web!
Wednesday, November 23, 2005
Happy Thanksgiving! Fun with the Weather Widget
Happy Thanksgiving to the MacNify readers in the USA!
It's a great weekend, so we shall have something not entire useful, but FUN! When your work on the computer gets dull, the weather widget may provide you some unexpected entertainment.
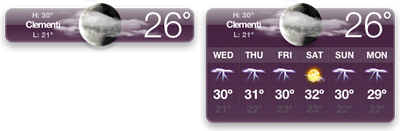
When you do a option+command+click, the weather location changes to 'Nowhere'. Every time you do this, the weather graphic changes to a different one. See if you can get what every graphic means!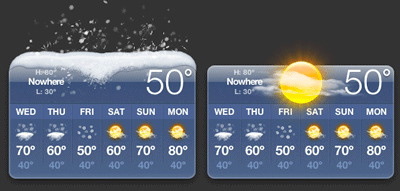
When the fun is over and you want the weather widget to point back to your preset location, just select the weather widget and do a command+r to reload it.
It's a great weekend, so we shall have something not entire useful, but FUN! When your work on the computer gets dull, the weather widget may provide you some unexpected entertainment.
Slow-mo the weather man
We all know that clicking on the weather widget will reveal or retract the 6-day forecast. However, it is not popularly known that doing a shift+click will turn this action into a slow motion.
If only you can dictate the weather
Too bad we can't. No matter which corner of the globe you are at, you hardly get all types of weathers in one place, but you can still have fun looping through all the weather types that the weather widget knows.When you do a option+command+click, the weather location changes to 'Nowhere'. Every time you do this, the weather graphic changes to a different one. See if you can get what every graphic means!
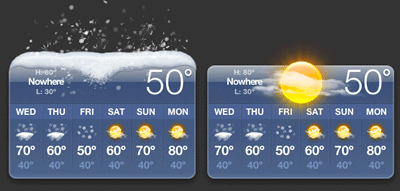
When the fun is over and you want the weather widget to point back to your preset location, just select the weather widget and do a command+r to reload it.
Yet another Mac tip is on the web!
Subscribe to:
Posts (Atom)